「SQLite Database Browser」を使い、SQLiteデータベースにレコードを追加し、セルにデータを入力する手順。
New Record
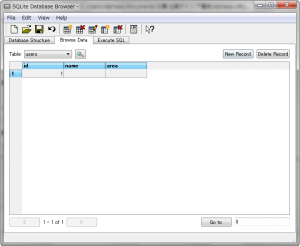
「Browse Data」タブを開き、「New Record」をクリック。
右の画像のようにレコードが追加される。
「id」のデータ型は、「INTEGER PRIMARY KEY」を指定してあるので、自動的に「1」が入力されている。
Edit Database Cell
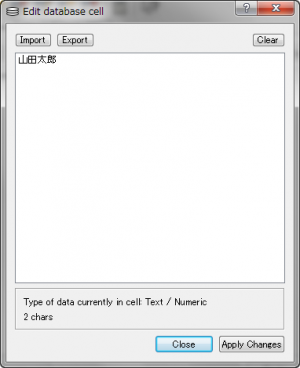
データを入力したいセルをダブルクリックすると、「Edit Database Cell」ダイアログが現れる。
「Edit Database Cell」ダイアログで、データを入力し、「Apply Changes」をクリックする。
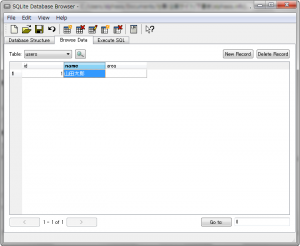
右の画像のようにセルにデータが入力される。
入力済みのセルのデータを編集したい場合も、セルをダブルクリックして現れる「Edit Database Cell」ダイアログで編集できる。
Save Database
編集したら、「File」メニューの「Save Database」で保存。