“レンズ補正”フィルターは、アクティブレイヤーもしくは選択範囲内の画像に対し、カメラレンズの球面による歪みの再現又は補正を施す変形フィルター。
歪みによりできた空白部分は、アルファチャンネルを持つアクティブレイヤーの場合、透過される。アルファチャンネルを持たないアクティブレイヤーの場合、背景色で塗りつぶされる。
“レンズ補正”フィルターの使い方
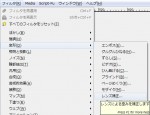
 メニューバーの「 フィルター > 変形 > レンズ補正 」で、「 レンズ補正 」ダイアログを開く。
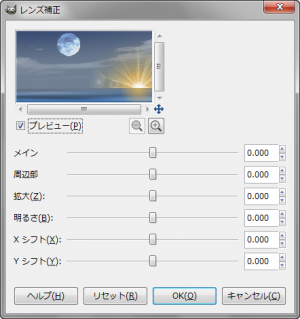
「 レンズ補正 」ダイアログ
- プレビュー
-
プレビューを有効にしておくと、ダイアログ上で、効果を確認しながら設定できる。
- メイン
-
カメラレンズの球面の曲がり具合を、「0.000~100.000」の範囲で設定。
-
正数は、凸状の球面、負数は、凹状の球面を再現。
- 周辺部
-
周辺部の曲がり具合を、「0.000~100.000」の範囲で設定。。
- 拡大
-
正数は、拡大。
-
負数は、縮小。
- 明るさ
-
カメラレンズの球面の曲がり具合による、明るさの変化の量を、「0.000~100.000」の範囲で設定。
-
「メイン」もしくは「周辺部」が、「0」以外の数値でなければ変化しない。
- X シフト
-
レンズの中心の横(水平方向)へのずれ具合を、「0.000~100.000」の範囲で設定。
-
正数は、右よりに、負数は、左よりになる。
-
「メイン」もしくは「周辺部」が、「0」以外の数値でなければ変化しない。
- Y シフト
-
レンズの中心の縦(垂直方向)へのずれ具合を、「0.000~100.000」の範囲で設定。
-
正数は、下よりに、負数は、上よりになる。
-
「メイン」もしくは「周辺部」が、「0」以外の数値でなければ変化しない。
“レンズ補正”フィルターによる生成例
 元画像。
元画像。
この画像に、”レンズ補正”フィルターを適用すると、それぞれ下のようになる。
 メイン:100.000
 メイン:-100.000
 周辺部:100.000
 周辺部:-100.000
 拡大:100.000
 拡大:-100.000
 メイン:20.000
明るさ:100.000
 メイン:20.000
明るさ:-100.000
 メイン:20.000
X シフト:100.000
 メイン:20.000
X シフト:-100.000
 メイン:20.000
Y シフト:100.000
 メイン:20.000
Y シフト:-100.000
 メイン:100.000
アルファチャンネルがある場合
 選択範囲に適用。
メイン:100.000
周辺部:100.000
X シフト:-100.000
Y シフト:100.000
“レンズ補正”フィルターの利用例

Gradient Difference Script (グラデーション系GIMPスクリプト)を、「Repeat:10/Random」の設定で適用し、下塗り。
“ビデオ”フィルターを「ビデオパターン:Hex マップ」で適用。
“レンズ補正”フィルターを、「メイン:100.000/周辺部:100.000」の設定で、数回適用し、変形。
背景は、Stars in the sky | 輝く星空や宇宙を生成するGIMPスクリプト。
文字は、クリスタル。

