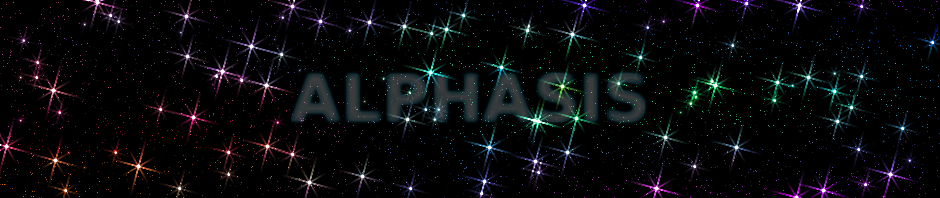
「浴びせ」、「きらめき」などを使い、カラフルな星空を描く方法。
新しい画像を作成
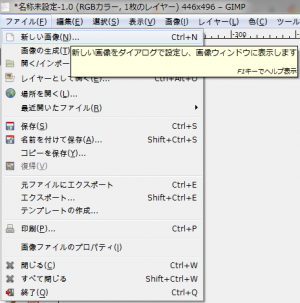
「ファイル⇒新しい画像」で、「新しい画像を作成」ダイアログを開く。
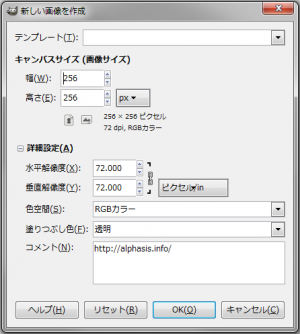
「高さ:256px」、「幅:256px」の画像を新規作成。
黒く塗りつぶす
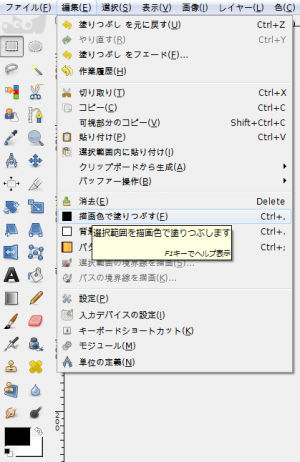
「描画色」を黒に設定し、「フィルタ⇒編集⇒描画色で塗りつぶす」で、黒く塗りつぶす。

右の画像のようになる。
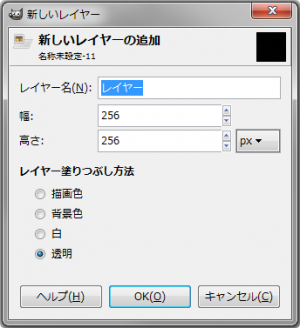
新しいレイヤーを追加
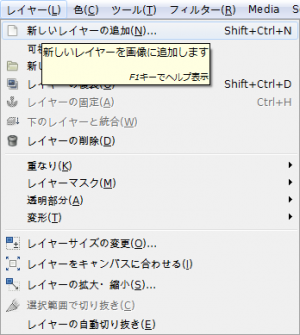
「レイヤー⇒新しいレイヤーの追加」で、「新しいレイヤー」ダイアログを開く。

「高さ:256px」、「幅:256px」、「レイヤー塗りつぶし方法:透明」の新しいレイヤーを追加。
浴びせ
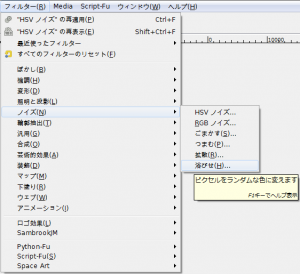
「フィルタ⇒ノイズ⇒浴びせ」で、「浴びせ」ダイアログを呼び出す。
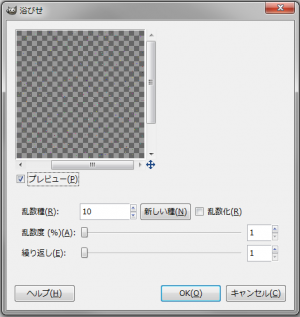
下記の設定で適用。
- 乱数種: 10
- 乱数度 (%): 1
- 繰り返し: 1
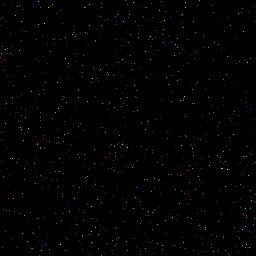
右の画像のようになる。
ここまでは、GIMPチュートリアル: カラフルな星空の作業と同じ。
脱色
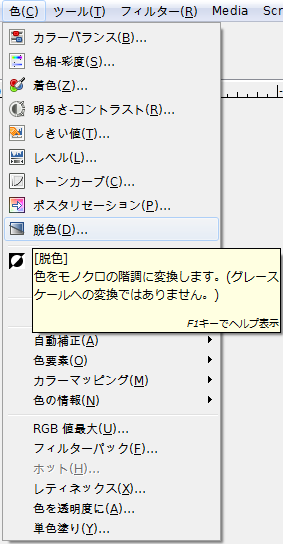
「色⇒脱色」で、「脱色」ダイアログを呼び出す。
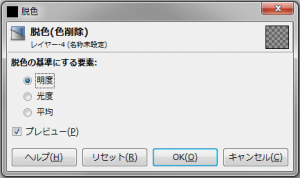
「脱色の基準にする要素:明度」で適用。
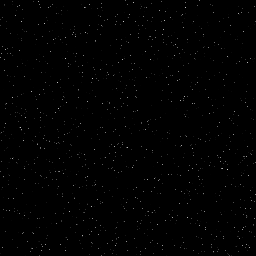
右の画像のようになる。
しきい値
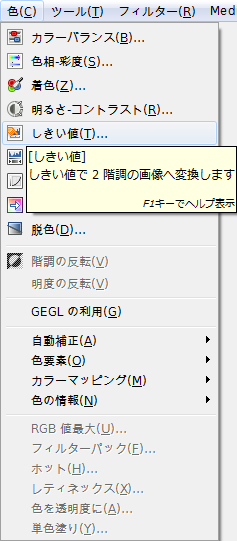
「色⇒しきい値」で、「しきい値」ダイアログを呼び出す。
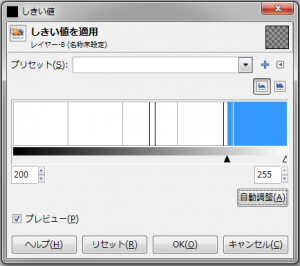
「150」から「250」の間の値で適用。この値で、星の数が決まる。

右の画像のようになる。
きらめき
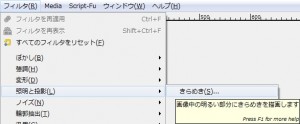
「フィルタ⇒フィルタ⇒照明と投影⇒きらめき」で、「きらめき」ダイアログを呼び出す。
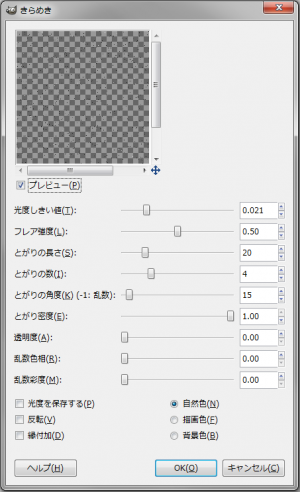
初期設定値から、「光度しきい値」だけを「0.021」前後に変更し、適用。

右の画像のようになる。
明るさ-コントラスト
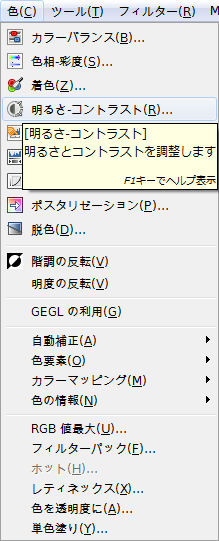
「色⇒明るさ-コントラスト」で、「明るさ-コントラスト」ダイアログを呼び出す。
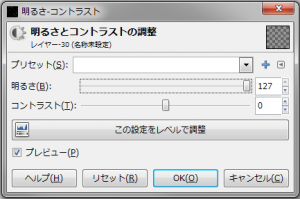
下記の設定で適用。
- 明るさ: 127
- コントラスト: 0
右の画像のように、小さな星が現れる。
これはこれで完成だが、ひと手間加えよう。
新しいレイヤーを追加

「レイヤー⇒新しいレイヤーの追加」で、「新しいレイヤー」ダイアログを開く。
「高さ:256px」、「幅:256px」、「レイヤー塗りつぶし方法:透明」の新しいレイヤーを追加。
プラズマ
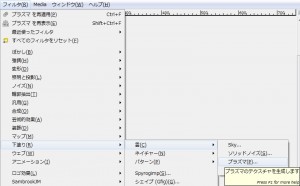
「フィルタ⇒下塗り⇒雲⇒プラズマ」で、「プラズマ」ダイアログを呼び出す。
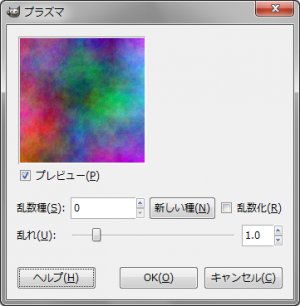
下記の設定で適用。
- 乱数種: 0
- 乱れ: 1.0
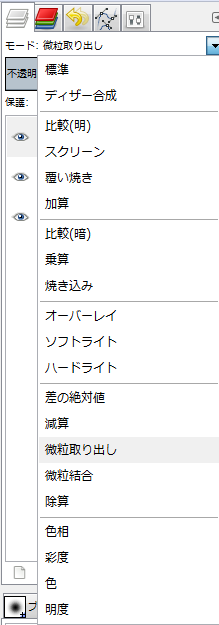
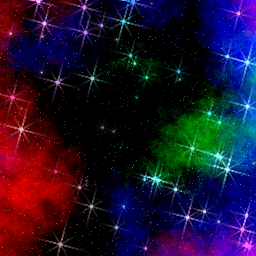
レイヤーのモードを「微粒取り出し」に変更。
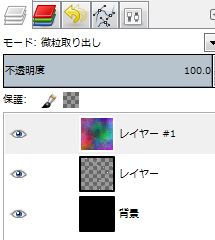
今までの作業で、右のように3つのレイヤーが重なっているはず。
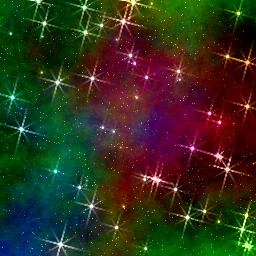
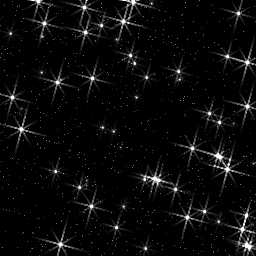
右の画像のようなれば完成。
プラズマのレイヤーのモードを「ハードライト」などにするなど、色々なモードを試してみるといい。それぞれ違った味がある。
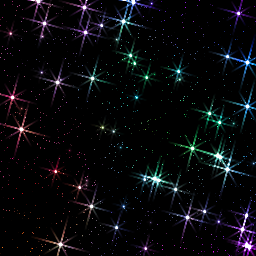
プラズマのレイヤーのモードを「色」にすると、星にだけ色が付く。