「モザイク・フィルタ」などを使い、六角形を敷き詰めた近未来的背景を簡単に描く方法。
新しい画像を作成
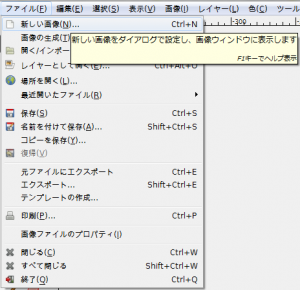
「ファイル⇒新しい画像」で、「新しい画像を作成」ダイアログを開く。
「高さ:256px」、「幅:256px」、「塗りつぶし色:白」の画像を新規作成。
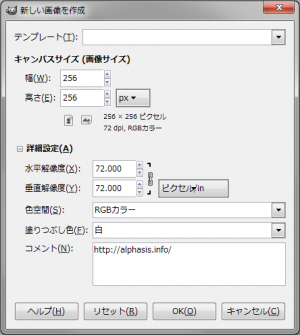
背景色を白に

「背景色」を白色「ffffff」に設定する。
モザイク
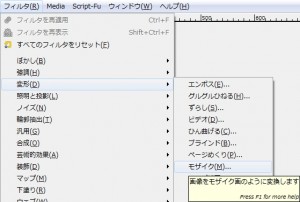
「フィルタ⇒変形⇒モザイク」で、「モザイク」ダイアログを開く。
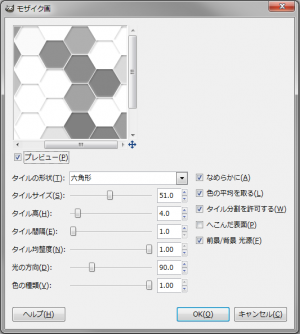
下記の設定で適用。
- タイルの形状: 六角形
- タイルサイズ: 51.0
- タイル高: 4.0
- タイル間隔: 1.0
- タイル均整度: 1.00
- 光の方向: 90.0
- 色の種類: 1.00
- 滑らかに: 有効
- 色の平均を取る: 有効
- タイル分割を許可: 有効
- へこんだ表面: 無効
- 前景/背景 光源: 有効
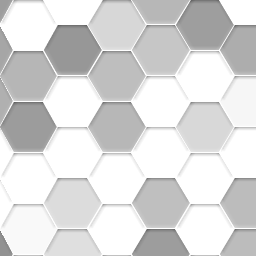
右の画像のようになる。
シームレス化
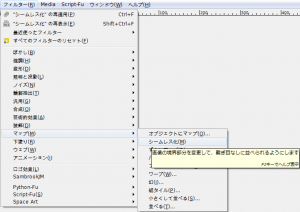
「フィルタ⇒マップ⇒シームレス化」で、シームレス化しておけば、並べても繋ぎ目のわからないシームレスなタイル画像になる。
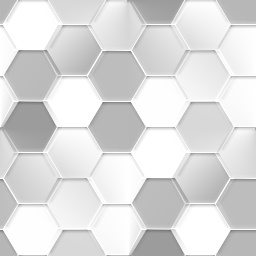
右の画像のようになれば完成。
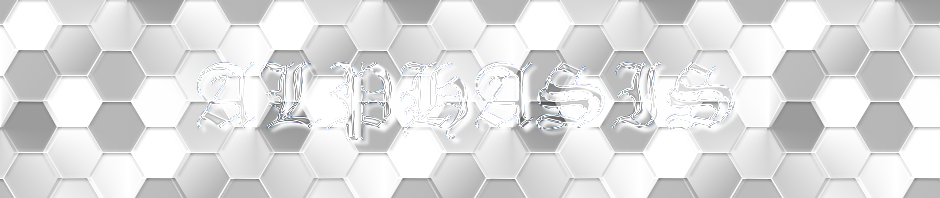
使用例
ヘッダーの背景に使用。

ヘッダーの背景に使用2。