GIMPの「フィルター」メニュー内の「合成」のサブメニューにある「深度統合」は、合成比率などを指定しながら、2つのレイヤーを合成し、アクティブレイヤーに出力するフィルター。
2つのレイヤーの合成具合は、グレースケールのグラデーションなどで指定できる。
深度統合
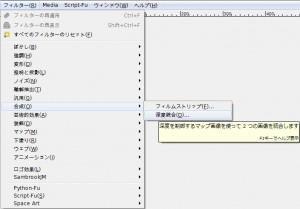
GIMPの「フィルター」メニュー内の「合成」のサブメニューに、「深度統合」はある。
「フィルター⇒合成⇒深度統合」をクリックすると、「深度統合」ダイアログが現れる。
「深度統合」ダイアログ
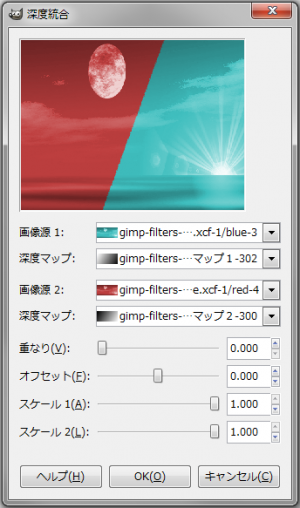
- 画像源1
合成する画像。
- 深度マップ
合成具合を指定するマップ画像を指定する。
暗い部位は画像が透け、明るい部分は透けない。
- 画像源2
合成する画像。
- 深度マップ
合成具合を指定するマップ画像を指定する。
暗い部位は画像が透け、明るい部分は透けない。
- 重なり
大きい値を指定すると、合成した境がグラデーションのように重なる。
小さい値を指定すると、合成した境が鮮明になる。
- オフセット
どちらか一方の画像を比率を高める。
- スケール 1
小さい値を指定すると、画像源 1の合成比率を下げる。
- スケール 2
小さい値を指定すると、画像源 2の合成比率を下げる。
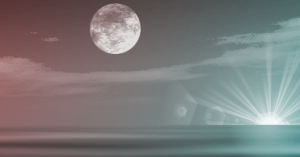
「深度統合」使用例
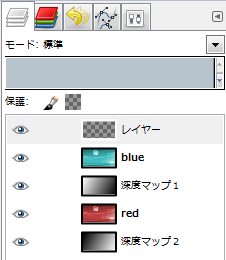
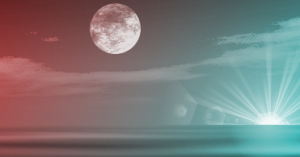
右の画像のように5つのレイヤーが並んだ状態で、「深度統合」を使用すると…、

デフォルト設定。
「重なり」を「1」に。
「重なり」を「2」に。

「オフセット」を「0.500」に。

「オフセット」を「-0.500」に。